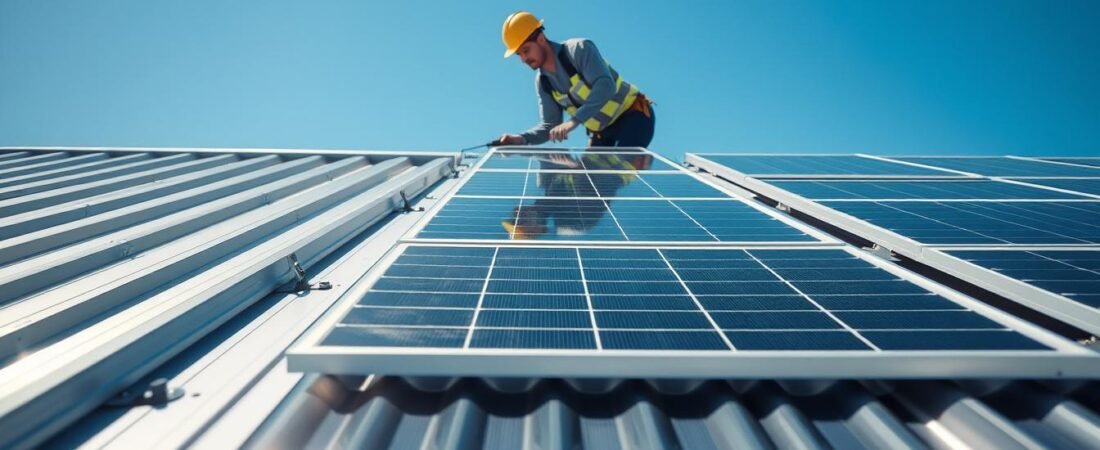
This short guide explains what a metal roof solar panel installation looks like in practice and what home owners in the United States should expect.
We define the process as choosing the right attachment for your roof profile, then installing mounting, racking, wiring, and modules in a clean, serviceable layout.
Start by confirming roof condition and type. That step helps match hardware to the substrate and protects warranties.
Standing seam systems often let crews use clamp-based mounting that avoids drilling. That reduces leak risk and keeps long-term performance strong.
This guide walks you through major choices: inspection, site assessment, mounting selection, leak-prevention when penetrations are needed, and final torque and documentation.
Use these pages to ask clearer questions of installers about mounting method, waterproofing, and warranty sign-off so systems last for decades.
Why metal roofs and solar panels work so well together
A long-lasting metal roof and a mid-life solar array make a practical match for homeowners planning decades ahead.
Durability match: Metal roofs typically last 40–70 years, while many solar panel warranties run about 25–30 years. That means a new roof often outlives a single solar system cycle, so you’re less likely to face major teardown costs partway through ownership.
Energy and comfort: Reflective coatings on modern metal roofs lower heat absorption. Solar modules add shade, which can further reduce rooftop temperatures. Cooler surfaces cut attic heat gain and can improve module efficiency on hot days.
Long-term value: When the roof outlasts the array, future swaps are simpler. Homeowners can replace modules without major roof work, lowering lifetime cost and disruption.
- Durable pairing reduces the chance of paying for removal and reattach midlife.
- Lower roof surface temps help reduce cooling loads and support better energy output.
- Both choices can be low-waste: recyclable roofing plus clean energy systems.
| Item | Typical lifespan | Impact |
|---|---|---|
| metal roofs | 40–70 years | Outlasts many arrays; fewer re-roofing conflicts |
| solar panel | 25–30 years (warranty) | Often produces beyond warranty; easier replacement later |
| Combined benefit | Decades | Lower cooling loads and reduced lifecycle waste |
Practical note: If your roof nears the end of life, address roofing first so installing solar is built on a stable base. The pairing works best when mounting methods match the roof profile and crews execute clean, watertight work.
Pre-install checklist for a smoother solar installation on a metal roof
Before crews arrive, run a clear checklist that focuses on roof condition, shade, and where attachments will land.
Confirm roof age, condition, and remaining life
Start by verifying the roof’s age and past repairs. Inspect for corrosion, loose fasteners, and oil-canning. Note any prior leak history and weak decking.
If the remaining life is short, replace or repair now. That avoids paying to remove an array later.
Assess site factors: sun exposure, layout, and attachment locations
Map shade, orientation, and setback rules for your site. Mark attachment locations to match structural members, not just the metal skin.
Layout matters: seams, crests, and ribs dictate where brackets go. Poor placement can hinder drainage and waterproofing.
Choose qualified solar installers with metal roofing experience
Ask installers for examples of standing seam, corrugated, and exposed-fastener projects. Confirm how they handle warranties and paperwork.
Check material compatibility — aluminum clamps and stainless fasteners can limit corrosion, especially near coasts or industry sites.
| Check | What to do | Who usually handles it |
|---|---|---|
| Age & condition | Inspect for corrosion, fasteners, leaks | Roofer / installer |
| Site layout | Shade map, orientation, attachment mapping | Installer / site assessor |
| Materials & paperwork | Verify compatibility and warranty approvals | Installer / manufacturer |
Final note: local codes and wind rules can change attachment spacing and racking choices. Confirm engineering needs early so your site plan matches permit and warranty requirements.
Identify your metal roof type before choosing mounting hardware
Confirming the profile first makes the hardware decision simple and safe. A short visual check tells you whether clamps or penetrative brackets are needed.
Standing seam vs. exposed-fastener systems
Standing seam roofs show raised vertical ribs several inches high. These seams accept clamp-on attachments that avoid holes and reduce leak risk.
By contrast, seam systems with exposed fasteners display screws and washers on the face. Those require penetrative brackets and careful sealing.
Corrugated and trapezoidal profiles
Corrugated metal and trapezoidal profiles are common on barns and warehouses. They cover large spans cheaply but often need through-fastening at crests.
Hardware must match the crest width so fasteners sit above the waterplane and do not pinch or bend panels.
Why shape, gauge, and material matter
Panel gauge and substrate affect clamp pressure and spacing. Thinner gauge panels need gentler clamping or more frequent supports to resist wind and snow.
Material compatibility also matters: coated steel and aluminum behave differently and call for corrosion-compatible fasteners and finishes.
- Look for seam height, visible screws, and rib spacing.
- Avoid “universal” clamps that don’t match seam geometry.
- Once you confirm the type, choose clamp-based or penetrative brackets accordingly.
Metal roof solar panel installation on standing seam metal roofing
Standing seam systems let crews attach clamps to vertical ribs, often avoiding any penetrations. This keeps the deck watertight and speeds the work.
Non-penetrating clamps that attach to raised seams
Clamps grip the raised seams and provide a secure anchor without drilling. Popular products include S-5!, IronRidge, QuickMount® Lynx®, and SnapNRack.
How clamp-based mounting reduces labor and lowers leak risk
Clamp systems cut steps: no sealant beads and fewer fastener passes. Crews place clamps, add rails or rail-less hardware, then mount modules—faster than penetrative brackets.
Racking compatibility and thin-film option
Confirm the clamp matches seam geometry, then verify it pairs with your chosen racking or rail-less system. As an option, thin-film products (e.g., MiaSolé) fit low-profile layouts but trade off some area efficiency.
Warranties and long-term reliability
Look for proper torque specs, correct placement, and clamp manufacturer warranty (many run near 10 years). Also confirm installer workmanship coverage and that the roof warranty stays intact.
Mounting solar panels on corrugated metal roofs without compromising drainage
Keep water paths clear: that rule shapes how brackets get placed on corrugated sheets.
Drainage-first rule: Place penetrative attachments on the top crest so the valley channels remain hole-free. That keeps runoff moving and reduces leak risk.
Bracket placement and spacing
Map structural supports under the sheet, then align brackets over crests. Space attachments to match wind-uplift and racking specs.
Consistent spacing helps the system resist loads over time and keeps drainage predictable.
Sealing options: cleaner choices
Factory-applied butyl or rubber gasket bases offer a tidy, repeatable seal compared with messy field sealant.
“Products like S-5! Corrubracket include factory-applied butyl, which simplifies sealing while supporting a tight fit.”
Fasteners and corrosion resistance
Use corrosion-resistant fasteners that match the roof coating and local conditions. Avoid mixing dissimilar metals to limit galvanic action.
Follow manufacturer specs for thread engagement and washer use to get predictable life in coastal or industrial areas.
Leak-prevention fundamentals
Pre-drill if required, seat gaskets fully, and torque fasteners to spec. Do not over-tighten; deforming panels or squeezing out seals causes leaks.
| Focus | Best practice | Why it matters |
|---|---|---|
| Bracket location | Top crest over structure | Keeps valleys clear and reduces leak points |
| Seal method | Factory butyl/rubber gasket | Cleaner, consistent seal; less field variability |
| Fasteners | Corrosion-resistant, matched metals | Extends service life and prevents galvanic corrosion |
Check warranties before penetrating any sheet. Some manufacturers limit allowed attachments or require approved brackets to keep coverage valid.
Serviceability tip: A neat bracket-and-rail layout preserves drainage and makes future access simple for repairs or system changes.
Solar mounting on trapezoidal and exposed fastener metal roof systems
Trapezoidal and exposed-fastener roofs need mounting choices that match ridge shape and drainage. Both types usually require penetrations, but the rib geometry and water plane control how brackets sit.
Why fit matters
Trapezoidal ridges vary widely. Brackets must match ridge width and height so holes sit above the base level. A poor fit can warp panels or place fasteners where water pools.
Sealant and UL-listed materials
Use UL-listed sealants and certified attachments. Follow surface prep, temperature, and cure instructions. Proper materials give long-term weatherproofing and keep warranties valid.
Raised and high-mount options
High-mount hardware lifts attachments above the water plane to improve drainage and limit standing-water exposure. Examples include S-5! RibBracket and Rooftech RT-MINI II, both used in the industry as durable options.
| Focus | Best practice | Why it matters |
|---|---|---|
| Bracket fit | Match ridge geometry | Prevents panel distortion and misplaced holes |
| Sealants | UL-listed products, correct prep | Ensures long-term waterproofing |
| Fastener care | Corrosion-resistant, correct torque | Protects exposed threads and roofing life |
Red flag: be wary if an installer uses the same universal fastener for every profile. That shortcut can compromise waterproofing or structural integrity. Choose skilled crews that treat bracket selection as an installation decision, not a one-size sale.
Step-by-step installation process from layout to final torque checks
The day on-site starts with a clear, measured layout. Mark array boundaries, confirm code setbacks, and map shade-impacted zones before lifting any gear.
Marking, structure checks, and staging
Locate structural members like purlins or rafters and mark attachment points so loads go into structure, not just thin metal sheeting.
Stage rails, clamps, and modules near work zones to cut trips and reduce labor time. Keep packaging secured so nothing blows off the roof.
Installing attachments, rails, then panels
Fit non-penetrating clamps on standing-seam profiles and sealed brackets on corrugated or trapezoidal surfaces. Use UL-listed sealants when penetrations are required.
Set rails or racking to spec, allow for thermal movement, then mount each panel with approved mid and end clamps. Maintain uniform gaps and consistent torque.
Wire management and service access
Route conductors in tidy runs. Use UV-rated clips and keep wires off sharp edges to simplify future service and troubleshooting.
Final inspection, torque checks, and documentation
Perform torque verification on critical fasteners, inspect surfaces for coating damage, and photograph workmanship for as-built records.
Warranty sign-off and installer safety
Confirm warranty needs and collect manufacturer sign-off and cut sheets to protect coverage later. Use correct fall protection and seal any anchor penetrations so they don’t become leak paths after removal.
Follow a proven DIY process or share these checkpoints with your installer to keep the project tidy, durable, and warrantable.
Conclusion
A careful match of mounting hardware to roof profile is the simplest route to a long-lasting system.
Decide by type: identify standing-seam, corrugated, or trapezoidal profiles first, then pick clamps or brackets made for that profile. Correct fit, corrosion-resistant fasteners, and UL-listed sealants keep leaks at bay.
Because metal roofs often outlive arrays, owners gain easier upgrades and fewer surprises over time. Non-penetrating seam methods lower leak risk, while penetrative approaches work when crews follow torque and sealing specs.
Next step: use this guide during quotes. Ask installers how they will protect drainage paths, prevent corrosion, and document workmanship and product approvals so your warranty and performance stay intact.