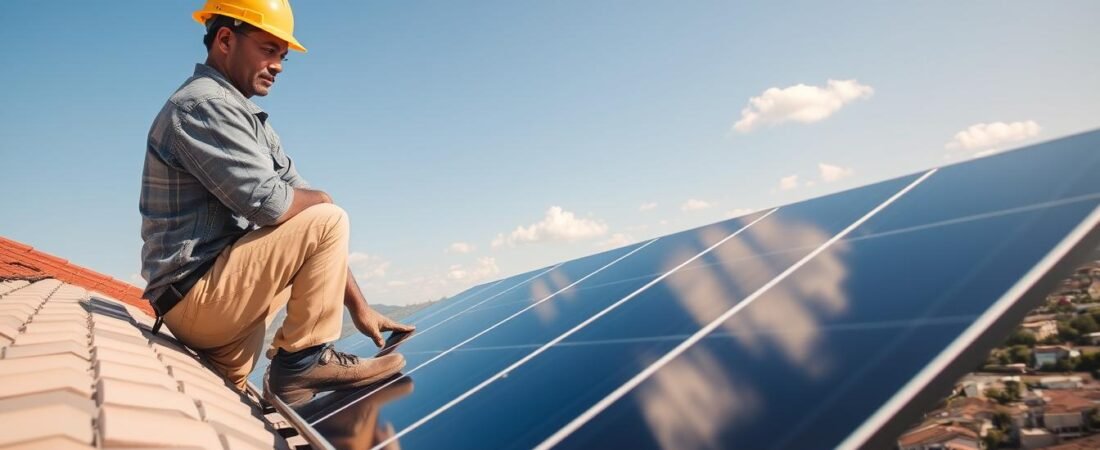
Ready to cut utility costs and boost reliability? This friendly guide walks you through every step of a residential energy project, from the initial site check to final handover. Good planning keeps a system working well for 20+ years.
Choose quality gear and a licensed installer. A skilled installer links the inverter, panels and balance of equipment so daily power output stays high. Knowing the total cost and the role of a C.O.C. helps you avoid surprises.
We cover how to compare companies, follow local regulations, and manage performance after handover. By following this guide south you gain control of your home energy future and protect your investment for many days to come.
Why Professional Solar Panel Installation in South Africa Matters
Professional work reduces risk and makes sure your equipment performs day after day.
The Risks of DIY
Do-it-yourself attempts can put you in harm’s way. High-voltage DC wiring may reach up to 600V and can cause severe injury.
Improper mounting risks roof damage and water leaks. Small errors in wiring create fire hazards and early equipment failure.
Benefits of Professional Expertise
Certified installers provide critical checks that DIY projects often miss. They run roof load calculations for panels that weigh 15–25 kg each.
Pros also perform wind-load modeling for speeds up to 200 km/h and place inverters in ventilated spots to avoid overheating.
- System design that integrates with the grid and stabilizes electricity supply.
- A valid certificate of compliance (C.O.C.) for insurance and resale.
- Higher quality workmanship, lower long‑term repair cost, and better power yield.
| Factor | DIY Risk | Professional Outcome |
|---|---|---|
| Safety | High (600V DC hazards) | Low (trained crews, regulations) |
| Structural Checks | Often missing | Roof load verified for 15–25 kg panels |
| Weather Protection | Undetermined | Wind loads to 200 km/h modeled |
| Compliance | No certificate | C.O.C. and code-compliant work |
The Complete Solar Installation Process
A well-run project turns a complex setup into a smooth two- or three-day job.
Step one is a full site assessment to pick the right system size and layout for your home. The assessment looks at roof angle, shading, and expected energy use.
On day one the installer mounts the panels, usually in landscape orientation, and spaces them for service access. Mounting teams also secure racking and verify roof integrity.
Day two often focuses on electrical work. A certified electrician connects the inverter and battery, ties the array to the electricity grid, and runs safety checks.
Compliance matters: operating without a C.O.C. is illegal and prevents grid connection. Professional installers handle approvals, paperwork, and municipal requirements such as those common in Cape Town.
“Thorough testing confirms the system produce matches design expectations and warranties are recorded.”
- All equipment should come from reputable suppliers to ensure long-term quality.
- Every installation ends with a documentation pack that includes the certificate compliance and performance tests.
| Phase | Typical Day | Key Outcome |
|---|---|---|
| Site Assessment | Pre-install | System size & layout agreed |
| Mounting | Day 1 | Panels aligned; racking fixed |
| Electrical & Commissioning | Day 2 | Grid connection; testing; C.O.C. |
For a detailed checklist and next steps, see this guide on solar installation basics.
Understanding Solar System Costs and Financing
A transparent cost summary makes it easy to judge value and plan financing for your home energy upgrade.
Typical price range: a 5kW solar system normally runs between R60,000 and R125,000 depending on equipment quality and battery options.
Breakdown of System Costs
Major cost areas: panels usually account for 25–35% of the total system cost. The inverter and batteries also take a significant share.
Labor, racking, wiring and permits appear on a detailed quote from reputable installers. Reputable teams use milestone payments rather than full upfront demands.
Financing Your Investment
Financing plans, including offers from banks such as Nedbank, let homeowners spread the costs over months or years.
Adding batteries raises initial costs but gives backup power during outages and can cut your electricity bill over time.
- Compare multiple quotes to balance cost and quality.
- Ask for a full breakdown: equipment, labor, grid connection, and warranties.
- Choose quality gear to lower long-term maintenance costs.
| Item | Typical Share | Notes |
|---|---|---|
| Panels | 25–35% | Main modules that generate power; quality affects yield |
| Inverter | 15–25% | Converts DC to AC; crucial for efficiency |
| Batteries | 10–30% | Optional backup; raises system cost but adds resilience |
| Labor & permits | 10–20% | Includes electrician work and grid connection fees |
“A well-sized system pays back through lower monthly electricity bills and greater energy independence.”
How to Select Certified Solar Installers
Picking the right certified team is the single best step to protect your investment and ensure long-term system performance. A careful choice reduces risk and improves output over the life of the system.
Start by checking credentials. Confirm the installer holds a valid PV Green Card and can show a recent C.O.C. for local grid work. Ask for the electrician’s wireman license number and verify it online.
Red Flags to Watch For
- Demanding full payment upfront instead of milestone payments.
- No references or examples of recent installations near your home.
- Vague contracts that omit exact equipment models, inverter specs, or warranty terms.
- Installers lacking public liability insurance for accidental damage on the day of works.
Insist on a written workmanship warranty of at least 5–10 years. A clear contract should spell out costs, service schedules, and who is responsible for maintenance.
“A certified installer will size the system from real consumption data, not rough estimates.”
Choose experienced installers who explain performance expectations and answer cost questions plainly. That transparency protects you and the system for years to come.
Navigating South African Solar Regulations and Compliance
Complying with electrical standards prevents costly problems and keeps systems online.
The SANS 10142 standard governs every electrical fit-out for domestic power upgrades. Your system must meet these safety rules so wiring, inverter siting, and earth protection are correct.
A valid certificate compliance (C.O.C.) is mandatory. Municipal rules — for example, Cape Town’s registration requirement for grid-tied systems — mean you cannot feed excess power back to the electricity grid without paperwork.
Operating without coc risks voided home insurance and legal issues. Professional installers know how to secure the certificate and register systems with local authorities.
- Regulations protect safety and ensure equipment quality and performance.
- Certified installers handle testing, documentation, and the final certificate.
- Proper compliance keeps your system a long-term asset for resale value.
“Following codes is not red tape — it protects your family and your investment.”
| Requirement | Why it matters | Who handles it |
|---|---|---|
| SANS 10142 | Ensures wiring and inverter safety | Licensed electrician |
| C.O.C. | Proof of compliant work; needed for insurance | Installer / electrical inspector |
| Municipal registration | Allows legal grid connection and export | Installer / municipality |
Regional Considerations for Your Solar Setup
Local climate and regulations shape the gear and layout you’ll need for a reliable home energy system.
Coastal environment challenges
Coastal sites such as Cape Town demand corrosion-resistant materials. For long-term durability, panels must use marine-grade aluminum frames and stainless steel fixings to resist salt spray.
Highveld lightning protection
The Highveld sees frequent storms. Installations there should include robust surge protection to guard the inverter and batteries from voltage spikes.
Estate and complex guidelines
Many estates enforce aesthetic rules. Installers often conceal conduit, match module colors, and follow strict placement rules to comply with body corporate requirements.
“A thorough site check reveals local risks and saves repair costs later.”
- Wind-load design is adjusted by the installer to match local gusts.
- Rural projects may add transport and accommodation costs to the quote.
- A quality installer will assess grid access, shading, and equipment needs before finalizing the design.
| Region | Key Risk | Typical Mitigation |
|---|---|---|
| Coastal | Salt corrosion | Marine-grade frames; stainless hardware |
| Highveld | Lightning surges | Surge protectors for inverter & batteries |
| Estates/Complexes | Aesthetic rules | Concealed conduit; color-matched modules |
Common Installation Mistakes to Avoid
Even simple oversights on the roof or in the wiring can cut expected output and create safety risks.
Poor waterproofing is one of the most frequent faults. Roof leaks can cause structural damage and void other warranties.
Undersized DC cables cause voltage drops and present a fire hazard. Installers must size wires correctly for the array current and run lengths.
- Panels must be angled and aimed right; small tilt errors can reduce what your system produce by 10–30%.
- Mixing module types or older units in one string forces the whole string to match the weakest item.
- An inverter placed in full sun or an unventilated cupboard will overheat and fail early.
Always confirm the installation date and that equipment comes from the same batch to keep performance consistent. A proper structural check ensures your roof can bear the weight of modules, rails and batteries.
“Avoiding these mistakes requires choosing a quality-focused installer who follows safety protocols and issues a valid C.O.C.”
Tip: Monitor the works and ask for paperwork. For a list of common pitfalls and how to prevent them, see common pitfalls to avoid.
Conclusion
Taking a measured step toward energy independence starts with a clear plan and trusted professionals.
Investing in a professional solar system can cut your electricity bill and boost household resilience. Compare quotes, check credentials, and confirm a valid certificate compliance (C.O.C.) before any work begins.
Choose certified solar installers who explain system cost, warranties, and maintenance. Ask about the inverter, batteries, and service schedule so performance stays high for years.
Follow regulations, secure the certificate, and keep documentation for resale or insurance. Start today by contacting a certified installer to move your home toward cleaner, reliable power.